Quick Start Guide
Welcome to AndroidNexus! This guide will help you set up your first managed device in under 10 minutes.
Prerequisites
Before you begin, make sure you have:
- At least one Android device (Android 8.0 or later)
- An AndroidNexus account with an active subscription
- The device in the state required for your enrollment type - most methods need a new or factory-reset device, but BYOD enrollment uses the user's existing personal device instead (see the Install Guide for specifics)
Step 1: Access Your Console
- Navigate to console.androidnexus.ai
- Sign in with your credentials
- You'll be taken to your Dashboard
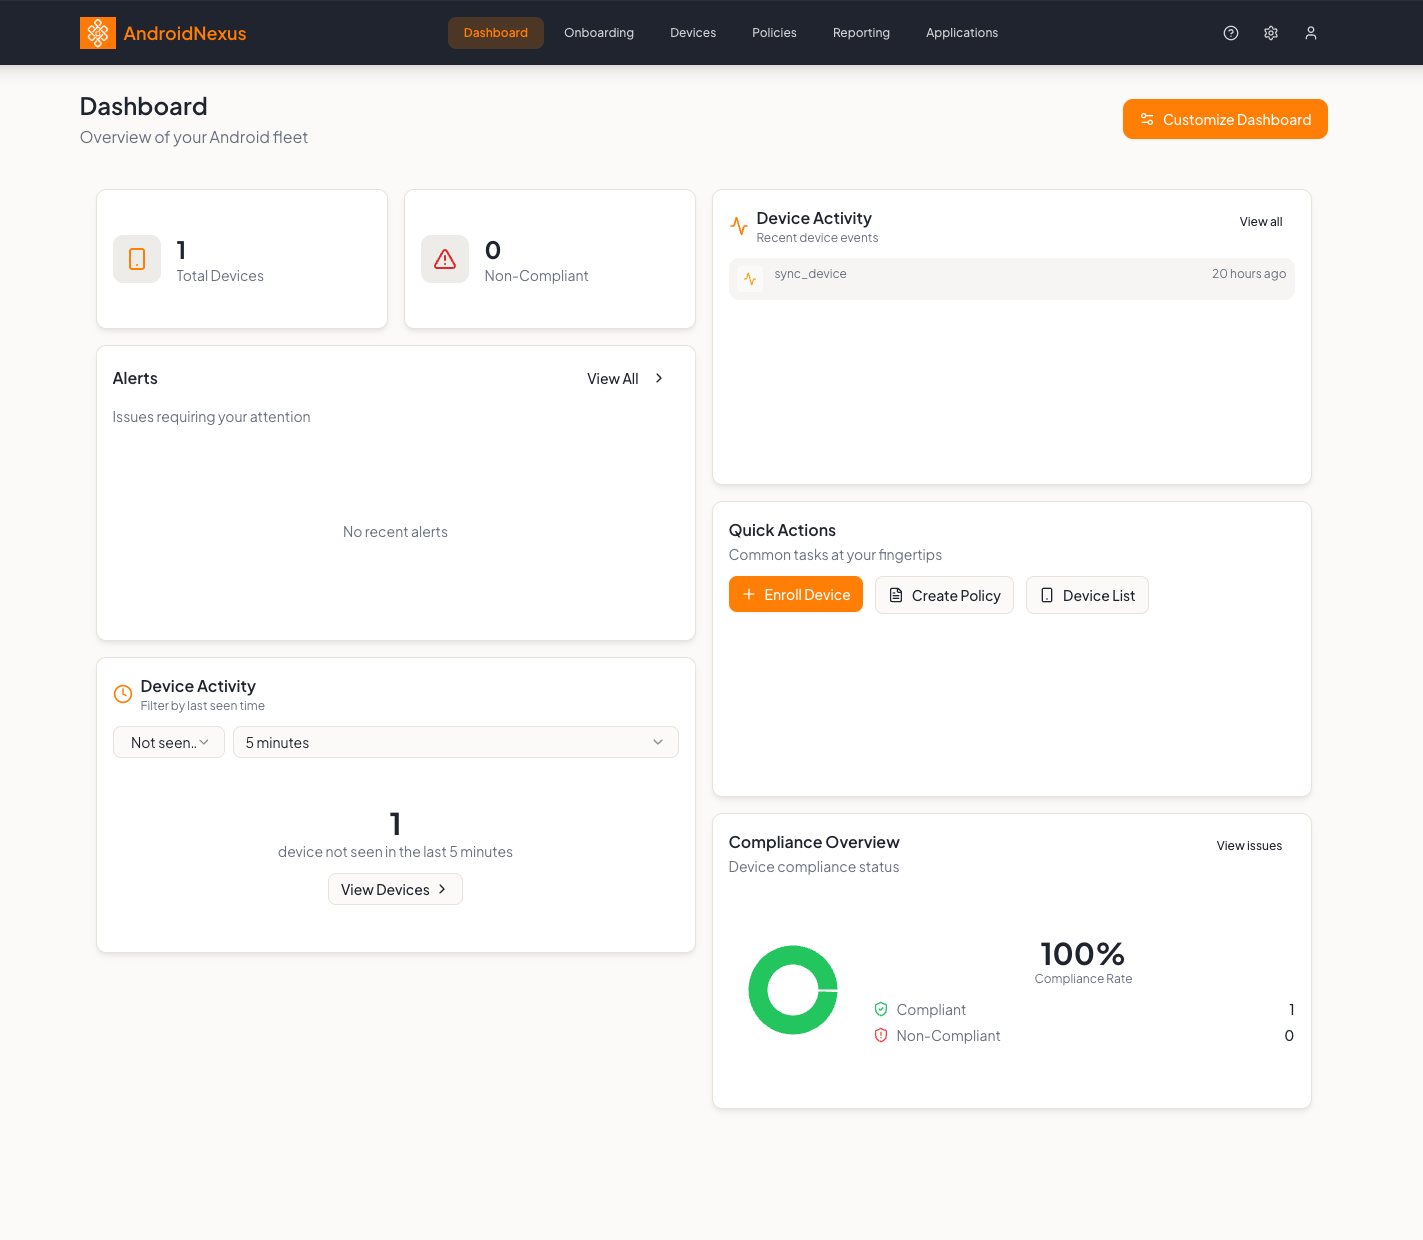
The Dashboard shows an overview of your Android fleet with two metric cards with the option to add more via Customize Dashboard: The orange button in the top right allows you to personalize your dashboard layout by adding more cards and the ability to move them around to fit your preferences.
Step 2: Setup Google AMAPI (Android Management API)
If you have not set up your Google AMAPI connection yet, follow the next steps; otherwise skip to step 3.
- Navigate to the settings page on your AndroidNexus Console (Cog icon located top right of the page)
- Scroll to the bottom of the settings page and under integrations click "Set up AMAPI"
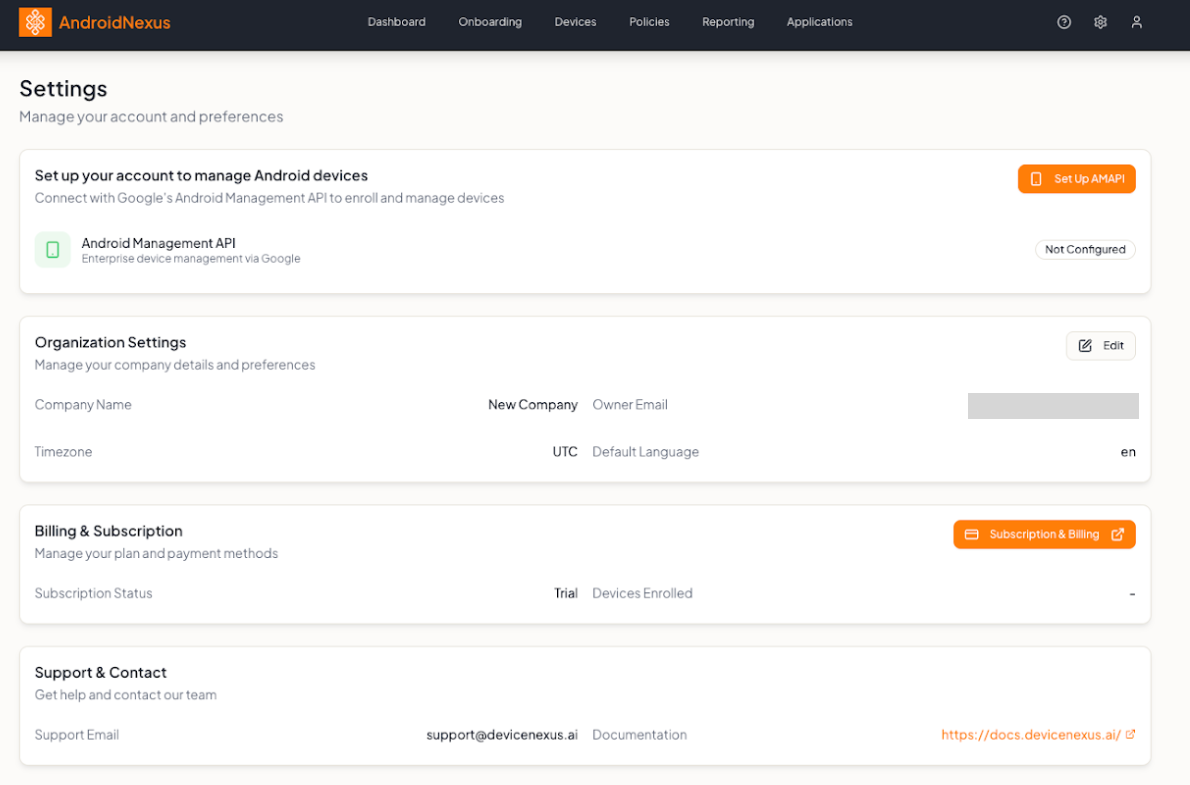 3. Type in your Google Workspace email and follow the Google prompts for setup
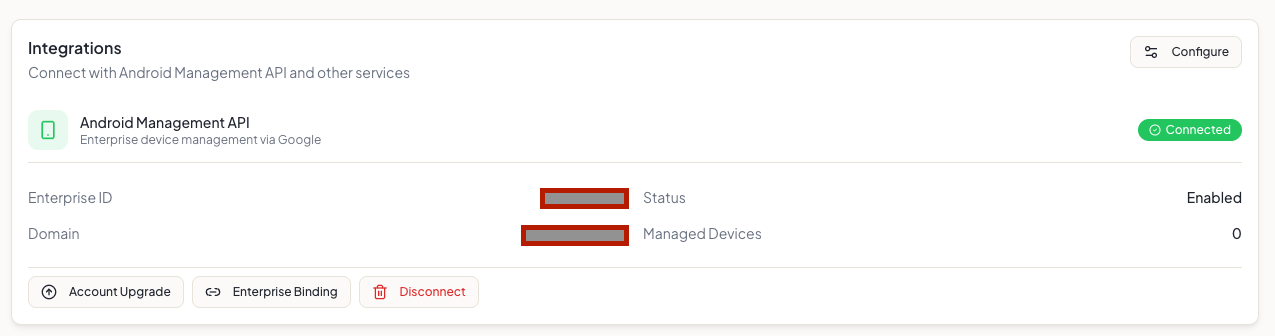 4. Once setup is complete, you'll see an enterprise ID and a "Connected" status.
If you are having issues with getting your AMAPI connection working please reference this detailed guide. Google AMAPI Setup
Step 3: Create a Policy
The first step in onboarding your first device onto AndroidNexus is to create a policy. This is where you define what a device and user can do.
- Navigate to the Policies tab on the navigation bar
- Press Create New Policy
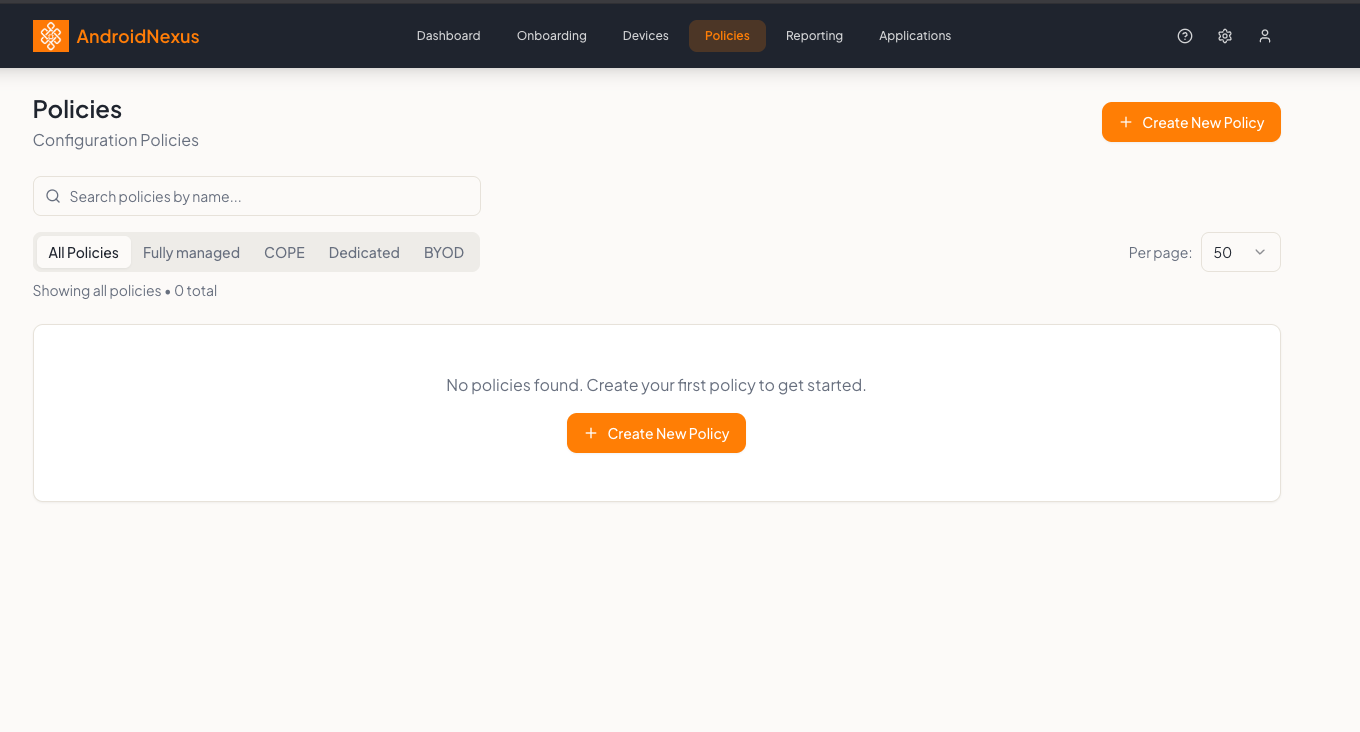
- Define the policy name, define the Device Mode selection and add a description. You can refer to the help document Device Modes Explained for more details on the differences between modes.
- Go through the Policy Configurations and define how you want the device to be setup. You can refer to Policy Overview and Creating Policies for more detail on the individual settings
- Once you have all your settings and applications defined press Save Policy
Step 4: Create an Onboarding Token
Onboarding tokens allow devices to securely register with your organization.
- Click Onboarding in the top navigation bar
- Click the Create Token button (orange button in top right)
- Fill in the token details:
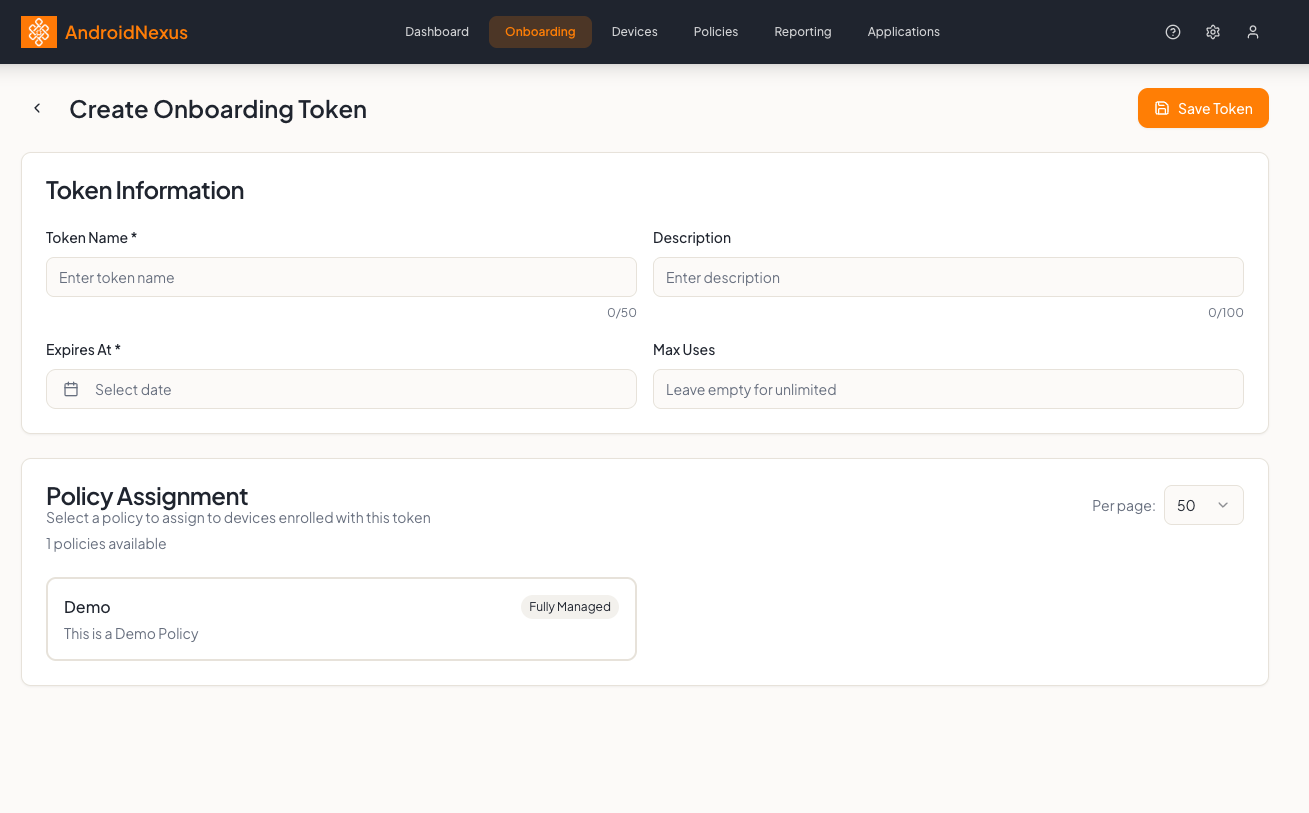
- Token Name - A descriptive name (e.g., "Sales Team Devices")
- Description - Optional description
- Expires At - When the token should expire
- Max Uses - Leave empty for unlimited, or set a limit
- Under Policy Assignment, select a policy to automatically apply to devices enrolled with this token
- Click Save Token
Create separate tokens for different departments or use cases. This makes it easier to track enrollments and apply appropriate policies.
Step 5: Get the QR Code
After creating a token, you need to get the QR code for device enrollment:
- Go to Onboarding in the navigation
- Find your token in the list
- Click the QR Code button next to your token
- The QR code will display - you can scan it directly or save it for later
Step 6: Enroll Your First Device
The exact enrollment steps depend on how the device is owned and used. Head over to the Install Guide, pick the enrollment type that matches your device (Fully Managed, Dedicated, BYOD, or COPE), and follow the steps for whichever method you'd like to use with the QR code from Step 5.
Step 7: Verify Enrollment
Once enrolled, verify the device appears in your console:
- Click Devices in the top navigation bar
- Your device should appear in the table below with:
- Device Code - Unique identifier (e.g., ADMR-AND-0001)
- Device Name - Friendly name and model
- Last Sync - When the device last checked in
- Policy - Applied policy name
- Managed Apps - AndroidNexus extension apps installed on the device
- Tags - Applied tags to the device
- Click on the device row to view detailed information
What's Next?
Now that your first device is enrolled, explore these features:
- Device Management - Monitor and control your fleet
- Policy Configuration - Create and customize policies
- Application Management - Deploy apps via Managed Google Play
- Reporting - Generate device snapshots and reports
Need Help?
- Check our FAQ for common questions
- Contact [email protected]