Policy Overview
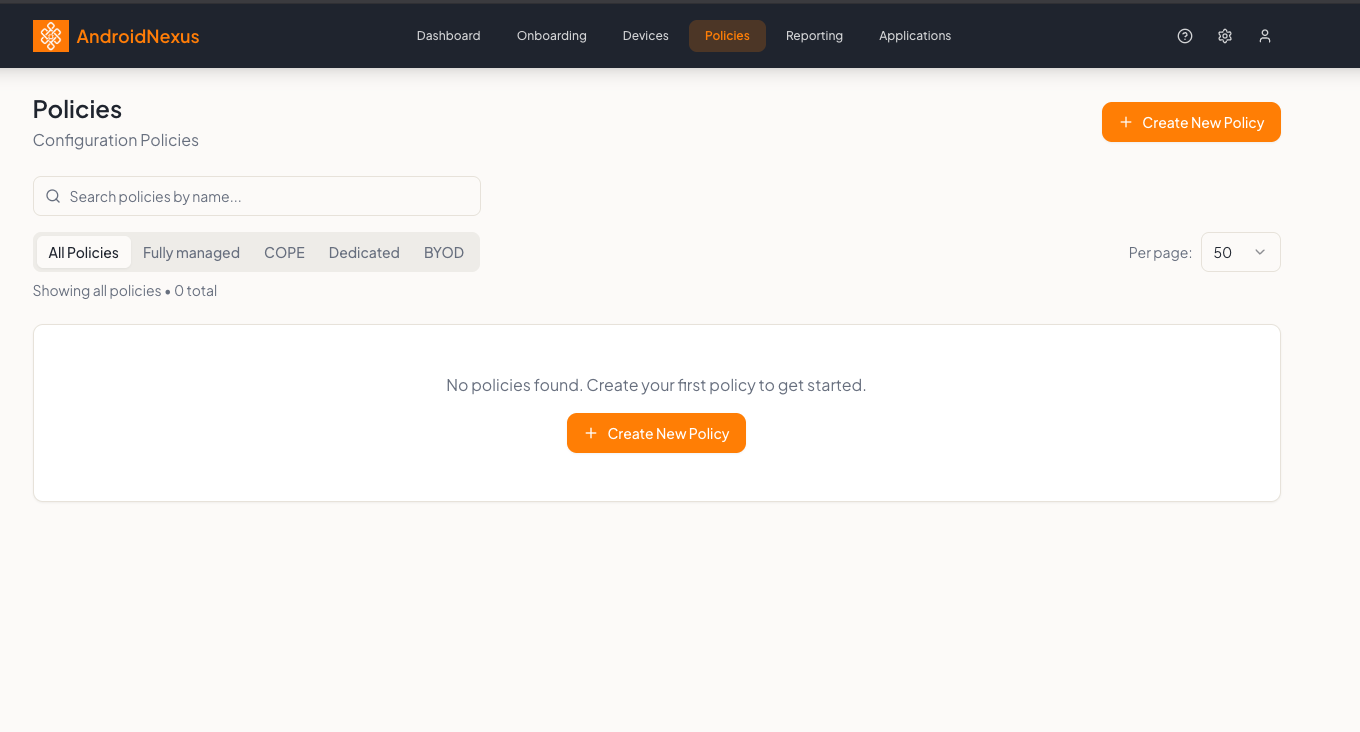
Policies are the core of device management in AndroidNexus. They define security settings, restrictions, app configurations, and device behavior for enrolled devices. Access policies by clicking Policies in the top navigation bar.
What is a Policy?
A policy is a configuration profile that controls how devices behave. When you apply a policy to a device (typically during enrollment via an onboarding token), AndroidNexus enforces those settings automatically.
The Policies Page
Filter Tabs
The top of the page includes filter tabs to quickly view policies by device mode:
| Tab | Description |
|---|---|
| All Policies | View all policies regardless of mode |
| Fully managed | Policies for company-owned, fully managed devices |
| COPE | Company-Owned, Personally-Enabled device policies |
| Dedicated | Policies for dedicated/kiosk devices |
| BYOD | Bring Your Own Device (work profile) policies |
A counter shows the total policies: "Showing all policies • X total"
Policy List
The main table displays all policies with these columns:
| Column | Description |
|---|---|
| Policy Name | Name of the policy |
| Description | Optional policy description |
| Mode | Device management mode (badge: Fully managed device, Dedicated device, etc.) |
| Version | Current version number (e.g., v17) |
| Assigned | Number of devices using this policy |
| Last Updated | Date of last modification |
| Actions | Edit button to modify the policy |
Creating a New Policy
Click the Create New Policy button (orange button, top right) to create a new policy.
Create/Edit Policy Page
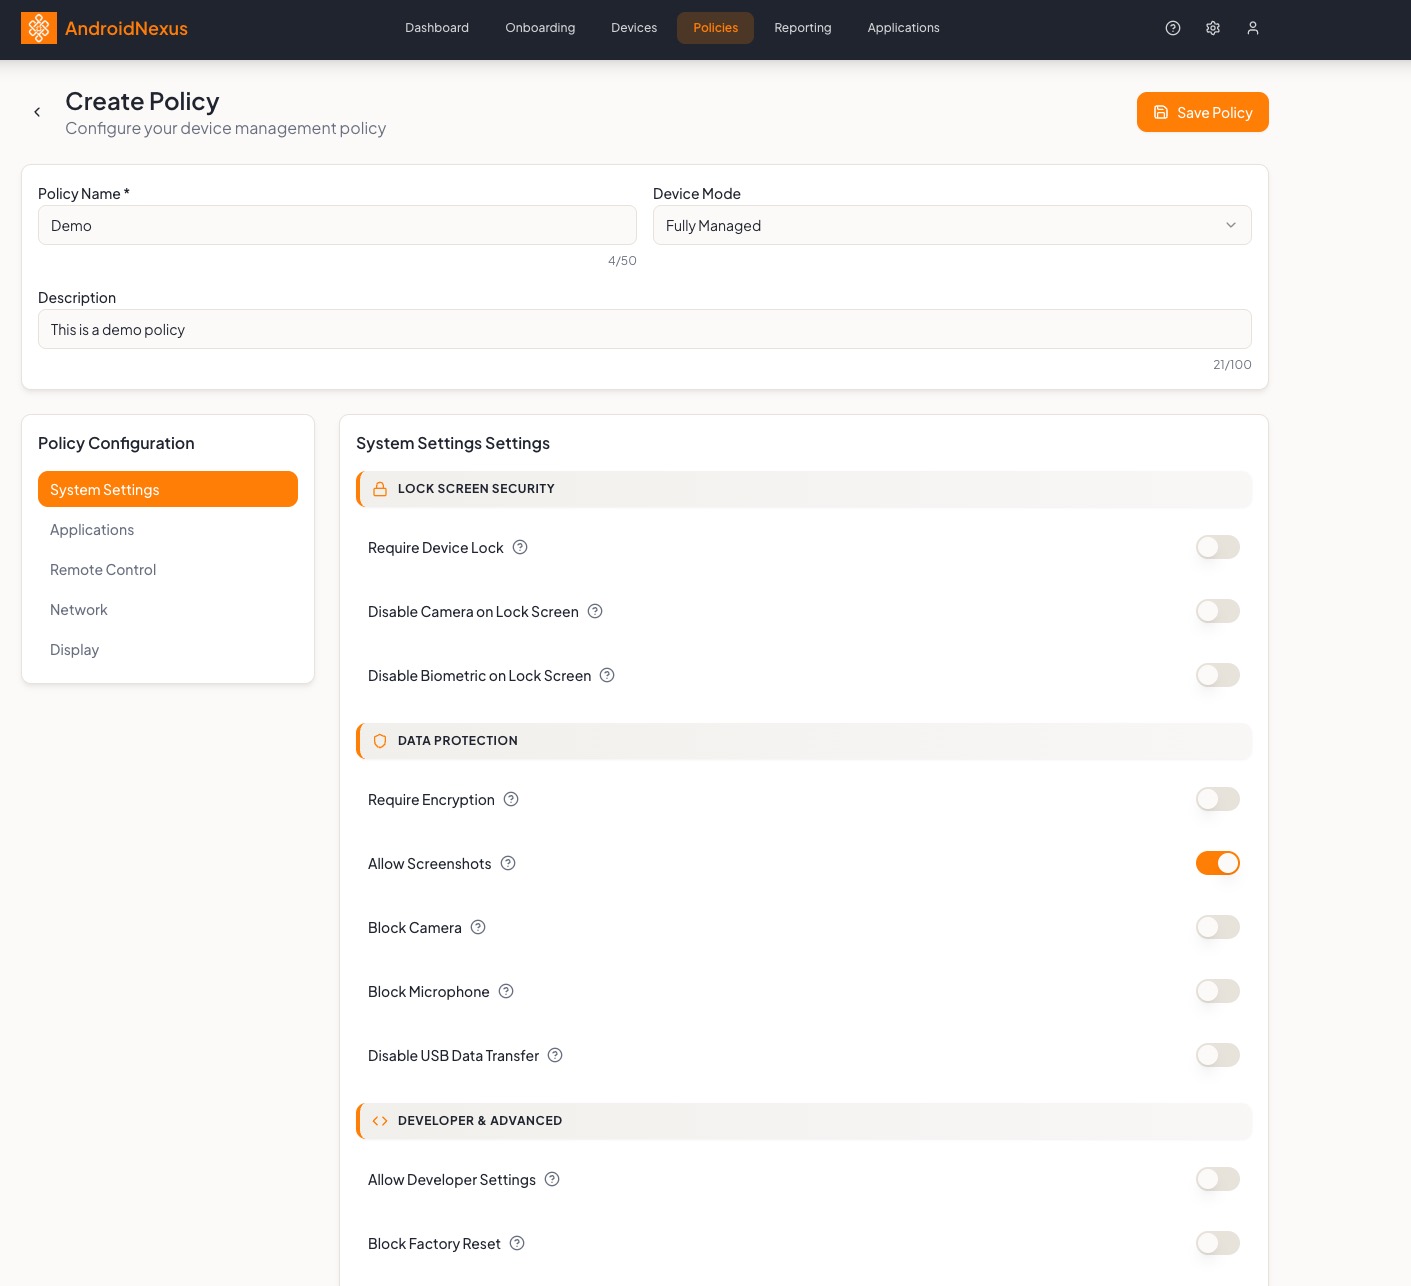
The policy editor is organized into header fields and configuration tabs.
Policy Header
| Field | Description |
|---|---|
| Policy Name | Required. A descriptive name for the policy |
| Device Mode | Dropdown to select: Personally Owned (BYOD), Fully Managed, Dedicated, COPE |
| Description | Optional description of the policy's purpose |
Action Buttons (Edit Mode)
When editing an existing policy:
| Button | Description |
|---|---|
| History | View policy version history |
| Clone | Make a copy of the current policy |
| Delete | Delete the current policy |
| Deploy | Execute application of this policy to a device/devices |
| Save Policy | Save changes to the policy |
Policy Configuration
The left sidebar contains configuration tabs:
- System Settings - Security, lock screen, Play Protect, account authentication, and system update settings
- Applications - App deployment and restrictions
- Network - Wi-Fi, VPN, and network settings
- Display - Screen and display configuration
- BYOD Work Profile - BYOD-specific settings (shown only for BYOD policies)
- COPE Work Profile - COPE-specific settings (shown only for COPE policies)
System Settings
The System Settings tab contains multiple sections organized with orange section headers. Each setting has a toggle switch and an info icon (?) for additional context.
Lock Screen Security
| Setting | Description |
|---|---|
| Require Device Lock | Force users to set up a lock screen |
| Disable Camera on Lock Screen | Block camera access from lock screen |
| Disable Biometric on Lock Screen | Disable fingerprint/face unlock on lock screen |
Data Protection
| Setting | Description |
|---|---|
| Require Encryption | Force device storage encryption |
| Allow Screenshots | Toggle on/off for screenshot capability (enabled by default) |
| Block Camera | Completely disable the camera |
| Block Microphone | Disable microphone access |
| Disable USB Data Transfer | Block file transfers over USB |
Developer & Advanced
| Setting | Description |
|---|---|
| Allow Developer Settings | Show/hide developer settings (enabled by default) |
| Block Factory Reset | Prevent users from factory resetting |
| Credential Manager Policy (Android 14+) | Dropdown with options: Unspecified (Default), and other credential handling modes |
Google Play Protect
| Setting | Description |
|---|---|
| Enforce Play Protect Verification | Require Google Play Protect app verification (enabled by default) |
Account Authentication
| Setting | Description |
|---|---|
| Require Managed Google Account | Require a managed Google account on the device |
System Updates
| Setting | Description |
|---|---|
| System Update Policy | Dropdown: Automatic, Windowed, Postpone |
System Update Freeze Periods
Define annual recurring periods when system updates are postponed. Click Add Period to create one.
Requirements:
- Each freeze period can be up to 90 days
- Periods must be separated by at least 60 days
- Periods repeat annually (e.g., Dec 15 - Jan 15 repeats every year)
- Updates are postponed during these periods
Applications Settings
The Applications tab allows you to configure the device's experience mode, app catalog, and restrictions.
Device Experience
Controls how the device behaves and how locked-down it is. There are four modes:
| Mode | Description |
|---|---|
| Standard | Apps install and run normally, no lock-down (default) |
| Single-app kiosk | Lock the device to exactly one app |
| Basic Multi-app | Android's standard home screen, showing only the apps you choose |
| Custom launcher | A fully customized home screen you design |
Each locked-down mode has its own app-assignment control:
- Single-app kiosk shows a single Kiosk app dropdown - choose the one app to lock the device to.
- Basic Multi-app shows a Home-screen apps list - add one or more apps as removable chips via Add app. A note banner reminds you that Basic Multi-app uses Android's native launcher and ignores wallpaper (wallpaper only applies to Single-app kiosk and Custom launcher).
- Custom launcher uses the launcher designer described below instead of a simple app picker.
- Standard has no additional app-assignment control - devices use whatever is in the App Catalog.
Kiosk Mode Settings
For Single-app kiosk and Basic Multi-app, a Kiosk Mode Settings section controls system-level behavior on the locked-down device:
| Setting | Description |
|---|---|
| Status Bar | Enabled or Disabled |
| Power Button | Available or Blocked |
| System Navigation | Enabled, Disabled, or Home Button Only |
| Settings App Access | Blocked or Allowed (Emergency Exit) |
| Show System Error Messages | Shown or Muted |
These are the same fields used for the kiosk policy step in the Dedicated enrollment guide.
Launcher Readiness
A Launcher Readiness panel validates the current Device Experience configuration and shows either an All clear badge or a badge listing the number of outstanding issues (e.g., 1 issue), along with what needs fixing - for example, "Choose the app to lock the device to" with a Choose app shortcut button if no kiosk app has been selected yet.
Custom Launcher Designer Overview
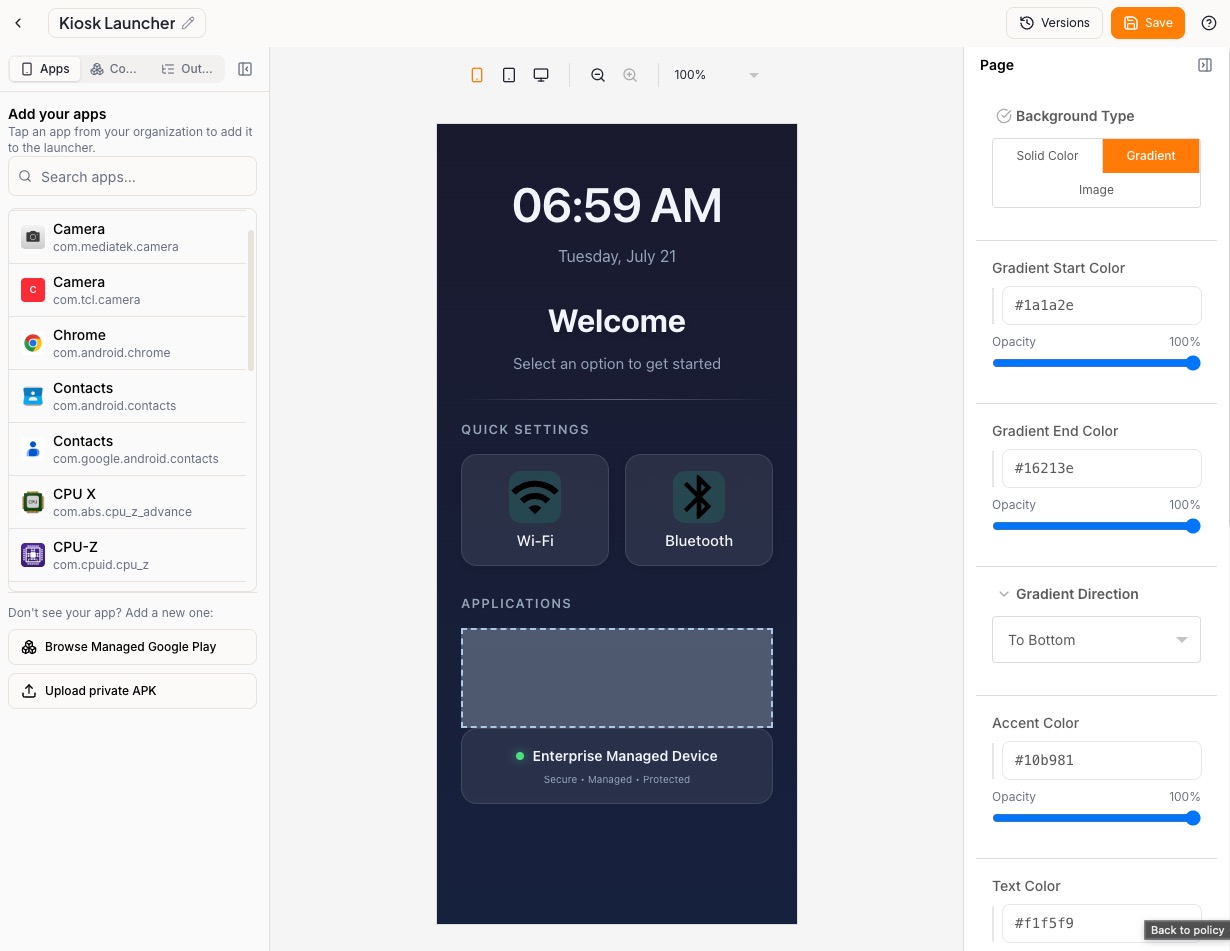
Selecting Custom launcher opens a dedicated launcher designer (separate from the main policy editor, with its own Back to policy navigation) where you can build a fully custom home screen for the device. The designer has three tabs:
- Apps - Search and add apps from your organization to place on the launcher. If an app isn't listed yet, you can Browse Managed Google Play or Upload private APK to add it first.
- Components - Drag-and-drop building blocks for constructing the launcher layout, grouped into Layout elements (Header, Grid Container, Section Header, Spacer, Divider), Tiles (App Tile, Settings Panel), and Widgets (Clock Widget, Quick Info, Image Block, Branding Bar).
- Outline - A tree view of every component currently placed on the page, for reviewing and navigating the layout's structure.
A live preview of the launcher renders in the center of the designer, with device frame and zoom controls, and Versions and Save actions at the top.
A Page settings panel on the right lets you customize the launcher's appearance - background (solid color, gradient, or image), colors, and similar styling options. These settings are general-purpose and may change as the designer evolves, so refer to the in-app controls directly rather than this doc for the exact current set of options.
In short: Custom launcher lets you design your own kiosk home screen from scratch, controlling the layout, colors, background image, quick settings, and applications shown, rather than using the fixed layouts of Standard, Single-app kiosk, or Basic Multi-app.
Launcher Library
Back on the policy's Applications tab, the Launcher Library shows the custom launcher(s) available to this policy, split into two tabs:
- This policy's launchers - Launchers built specifically for this policy. If none exists yet, building one here creates and links it automatically when you save the policy.
- Templates - Launchers saved as reusable templates, which can be applied across multiple policies instead of building a new one from scratch each time.
Each launcher card shows its name, last-edited date, and status:
- Draft - The launcher has unsaved changes and won't go live until the policy is saved. A Goes live when you save badge indicates this.
- Once the policy is saved, the launcher publishes and rolls out to that policy's devices automatically, the same way any other policy update deploys.
From the card you can Edit the launcher (reopening the designer) or Remove it from the policy.
App Catalog
Apps installed on or available to devices, sourced from Google Play or uploaded APKs. Click Add apps to browse Google Play or upload a private APK. If no apps have been added yet, this section shows an empty state prompting you to add your first app.
Each app in the catalog shows its icon, name, source badge (e.g., Play), package name, and a status badge (Setup Required or Available) that reflects its Install Type. Action icons let you Configure (gear), Block (circle-slash), or Remove (trash) the app.
Clicking Configure on an app opens its per-app settings:
| Setting | Options |
|---|---|
| Install Type | Required for Setup, Required (after setup), or Available (user choice) |
| Runtime Permissions | Prompt User, Auto Grant, or Auto Deny |
| Update Policy | Play Store Default, Auto Update, or Postpone (90 days) |
| Credential Provider (Android 14+) | Use Policy Default, or Allow as Credential Provider |
This Update Policy controls how an individual app updates through the Play Store. It's separate from the device-level System Update Policy (Automatic, Windowed, or Postpone) under System Settings, which controls OS and security patch updates.
Blocked Applications
Apps that will be disabled or prevented from running, including preloaded system apps. Paste package names separated by commas or new lines (e.g. com.facebook.katana, com.samsung.android.bixby.agent) and click Add to Blocklist. Blocked apps are disabled and removed where the OS allows.
Companion App
A device-resident helper app for wallpaper, private-APK install, and on-device quick settings. Toggle Enable Companion App to turn it on. (If not avilable reach out to [email protected])
App Installation Settings
| Setting | Description |
|---|---|
| Allow Play Store browsing | Off restricts users to policy-specific apps only. On gives users access to install applications from the Google Play Store. |
| Allow sideloading APKs | Dropdown to control APK sideloading (e.g., Blocked on entire device) |
Device Modes Explained
Fully Managed Device
Complete control over the entire device:
- IT manages all apps and settings
- No personal usage intended
- Best for company-owned devices used only for work
Dedicated Device
Locked to specific use cases:
- Kiosk mode configurations
- Single-app or multi-app launcher
- Ideal for shared devices, point-of-sale, signage
COPE (Company-Owned, Personally-Enabled)
Company device with personal space:
- Work profile for business apps
- Personal profile for user apps
- IT controls work side, limited control over personal
BYOD (Bring Your Own Device)
Work profile on personal devices:
- Separate container for work apps
- Personal apps/data untouched by IT
- Work data is encrypted and isolated
Applying Policies
Policies are applied to devices in two ways:
During Enrollment
- Create an onboarding token in Onboarding
- Select a policy in the Policy Assignment section
- All devices enrolled with that token receive the policy
To Existing Devices
- Go to Devices
- Select devices using checkboxes
- Click Apply Policy
- Select the policy to apply
Policy Versioning
Each time you edit and save a policy, the version number increments (v1, v2, v3...). This helps track changes over time.
When you update a policy:
- The new version is automatically pushed to all assigned devices
- Devices sync the updated policy on their next check-in
- You can see the applied version in each device's detail view
Best Practices
- Use descriptive names - Name policies by purpose (e.g., "Sales Team Standard", "Warehouse Kiosk")
- Start restrictive, then relax - Easier to loosen restrictions than add them later
- Test with a pilot device - Apply new policies to test devices first
- Document policy purposes - Use the description field to explain intent
- Group similar devices - Create policies for device categories, not individual devices
- Review regularly - Audit security settings quarterly
Next Steps
- Creating Your First Policy - Step-by-step guide
- Application Deployment - Add apps to policies
- Device Enrollment - Apply policies during enrollment